Assembly of the Rover
Physical Assembly#
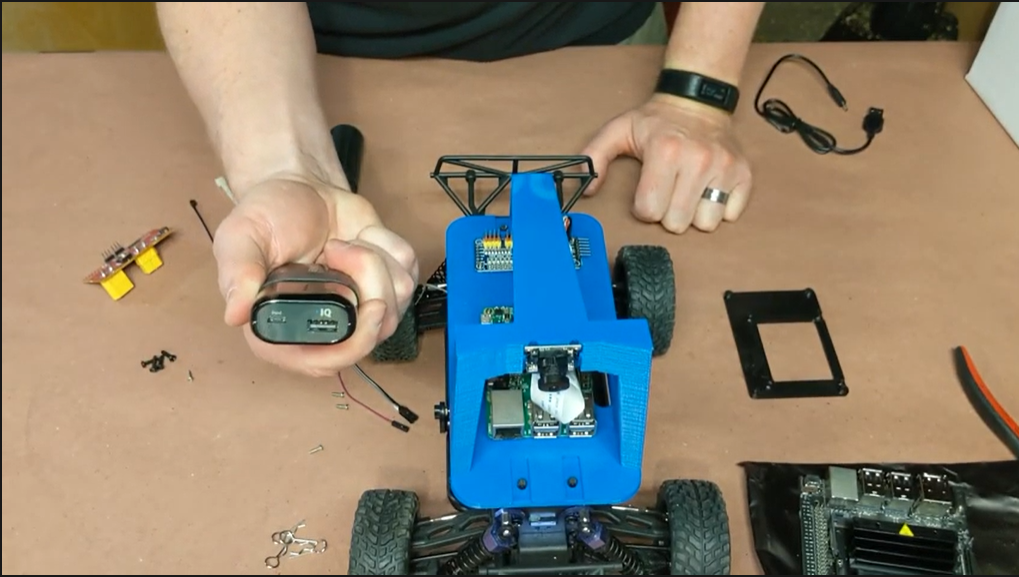
The Rover will consist of two main parts, the RC Car/Chassis and the Pi, Navio2, and Sensors. We will set these parts up separately then combine them when it is time to drive.
Click to expand
Attach Navio2 to Pi#
To make attach the Navio2 to the Pi, make sure it is oriented the right way then connect through the GPIO and screw them together with the provided screws and spacers. You can find more documentation here.
Plugging in the Telemetry Unit and GPS#
The air telemetry unit gets plugged into the UART Port, the ground telemetry unit gets plugged in on any available USB Port on your ground station, while the GPS Module gets plugged into the ANT Port on the Navio2. Make sure that you have as little electronic and atmospheric interference as possible in order to get the best results.
Connect RC Car to Chassis#
After taking the top off your RC Car, you will put the adaptors in and attach the Chassis. Make sure to secure it on with the clips.
 Click for link to full video!
Software setup#
First time setup for Mission Planner, U-Center, Navio2 OS, Pi, and Telemetry Units.
Click to expand
Mission Planner#
Go to the installation site and follow the steps to install Mission Planner.
U-Center#
Go to the installation site and install the executable, run it, and follow the installation steps.
Navio2 OS#
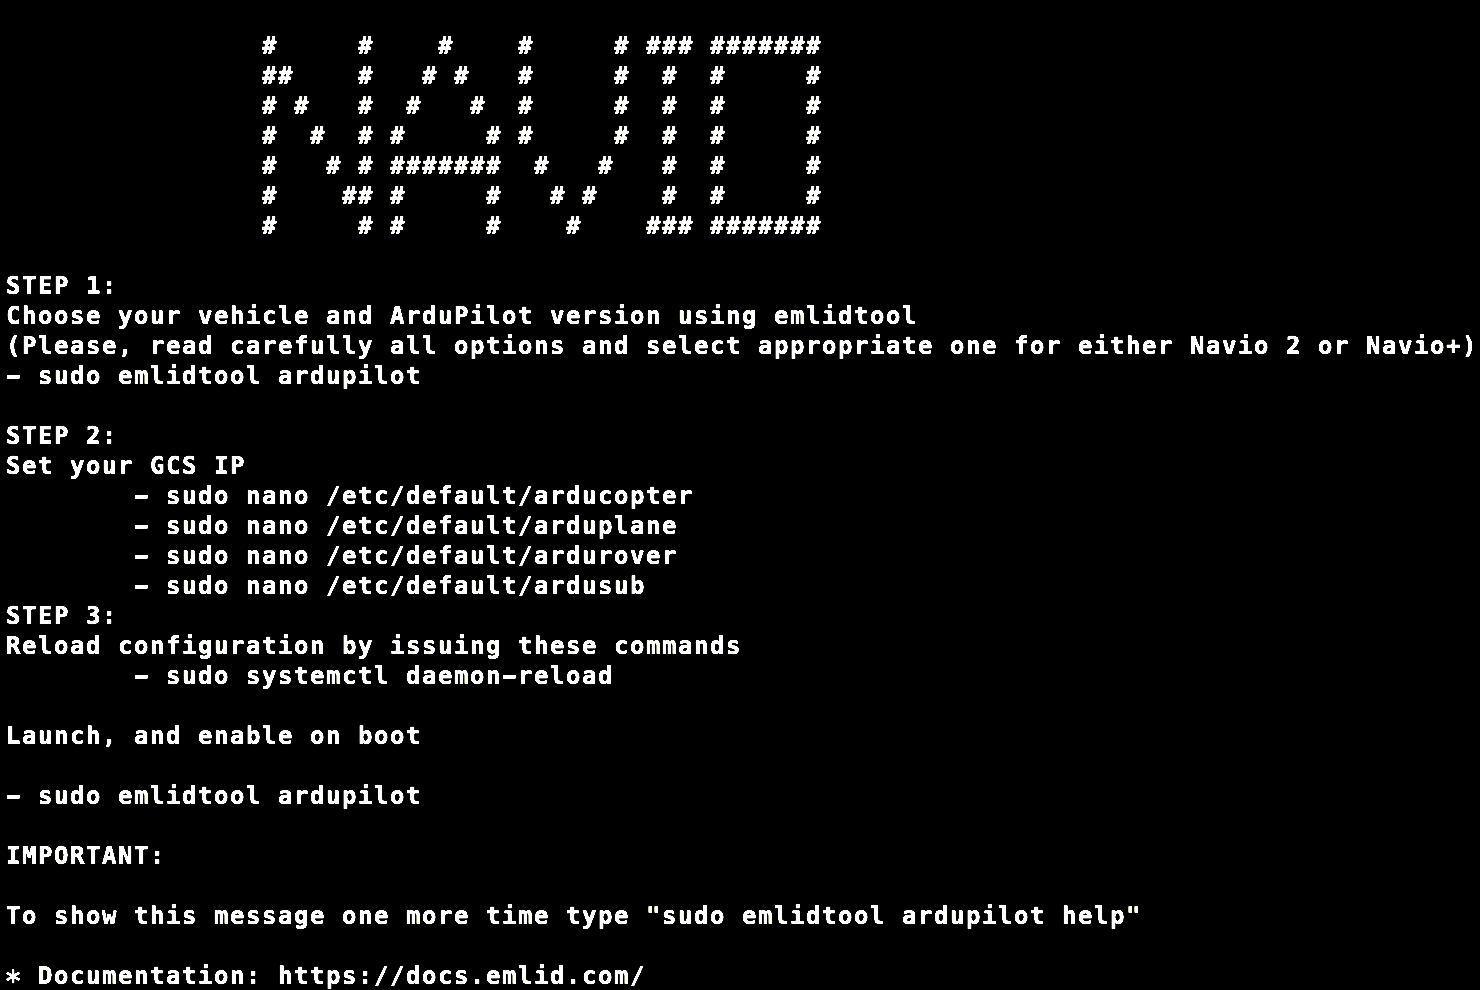
Go to the installation site and download their pre-configured Raspbian image. Then use a imager like the Raspbian Imager or Etcher to write it to the SD Card you will be using with your Pi. After the imager is done, boot up your pi with the new image and you will be see the Navio's greeting message:
 (https://docs.emlid.com/navio2/ardupilot/installation-and-running)
Now, you will be following the on-screen steps to set up your Navio2 as a autopilot for your rover. Remember, you can always view this message again by typing:
sudo emlidtool ardupilot helpYou can view a more detailed walk-through through Emlids documentation.
Pi#
Aside from flashing the SD with the Navio Image, the only other setup you can do with your Pi itself is setup wireless connection like SSH if you wish to connect to your rover through these means. It can be very helpful when bug testing and preforming first time set-ups, but is completely optional.
Telemetry Units#
In order to connect your Navio2/Pi to your ground control station using telemetry, you should edit your GCS IP file on the Navio2. To open the file, type:
sudo nano /etc/default/arduroverOnce in the file, your should see something like this:
TELEM1="-A udp:127.0.0.1:14550"#TELEM2="-C /dev/ttyAMA0"
# Options to pass to ArduPilotARDUPILOT_OPTS="$TELEM1 $TELEM2"
# -A is a console switch (usually this is a Wi-Fi link)
# -C is a telemetry switch# Usually this is either /dev/ttyAMA0 - UART connector on your Navio# or /dev/ttyUSB0 if you're using a serial to USB convertor
# -B or -E is used to specify non default GPSThis tutorial uses Telemetry, so you should comment out the line that tells ardupilot to connect via a Wi-Fi link so it looks like:
#TELEM1="-A udp:127.0.0.1:14550"and un-comment the line that tells ardupilot to connect via a telemetry switch. This line can also be edited depending on the type of telemetry you are using. For UART connections you will change the line to:
TELEM2="-C /dev/ttyAMA0"and for serial to USB converters:
TELEM2="-C /dev/ttyUSB0"Now the start of your file should look like either:
#TELEM1="-A udp:127.0.0.1:14550"TELEM2="-C /dev/ttyAMA0"if your telemetry uses a UART port or, if you are using a serial to USB converter to use telemetry it should look like:
#TELEM1="-A udp:127.0.0.1:14550"TELEM2="-C /dev/ttyUSB0"Your telemetry units will blink green when looking for their partner unit and maintain a solid green when they are connected to their partner. If your telemetry units are not communicating try restarting/rebooting your ground station with the telemetry unit remaining plugged in and failing that update your units drivers. If you encounter any more problems you should contact the manufacturer.