Configuration
While testing or configuring, powering the Pi and Navio2 combo through the Pi's USB Power is fine but will need to be changed to the Power Module supply through the Navio2's Power Port when being used as a rover.
Navio2#
The Navio2 has configurations for testing and deployment depending on your needs, it is important to use the correct configuration otherwise your rover will not work or could even get damaged.
Click to expand
Testing Configuration#
When testing, Ardupilot has to be turned off. This can be done by using the command:
sudo emlidtool ardupilotFrom this screen, you should be able to edit some of your settings, such as the state of ardupilot, what vehicle you are using, the model of the vehicle, and whether or not you want ardupilot to run on boot. you should turn this off if you will be doing testing for multiple sessions otherwise you will have to manually turn it off every time you boot your Pi up. For testing purposes, make sure you turn ardupilot off.
Reload your configuration by typing:
sudo systemctl daemon-reloadRover Configuration#
When you are ready to drive as an autonomous rover, you will need to turn ardupilot back on. This can be done by typing:
sudo emlidtool ardupilotthen either turning ardupilot on or if you are done testing for the foreseeable future you can let ardupilot run on boot so you don't have to manually turn it on every time you boot up your rover.
Make sure to reload your configuration with:
sudo systemctl daemon-reloadMission Planner#
To connect your Mission Planner with your Navio2 select COMX (the X is arbitrary) from the drop down menu in the top- right corner of the screen with the appropriate baud-rate for your telemetry unit. Hit connect and you should be greeted with a loading bar that will give way to your cars location on the map with data readouts on the left hand side of the screen.
U-Center#
U-Center is a powerful tool you can use to check how many satellites are connected to a given computer. This is immensely helpful as we will be able to see the direct connections that our Pi is making with the satellites and will be able to diagnose problems with our connectivity better.
After downloading and installing with the wizard, you should see a screen that looks like this:
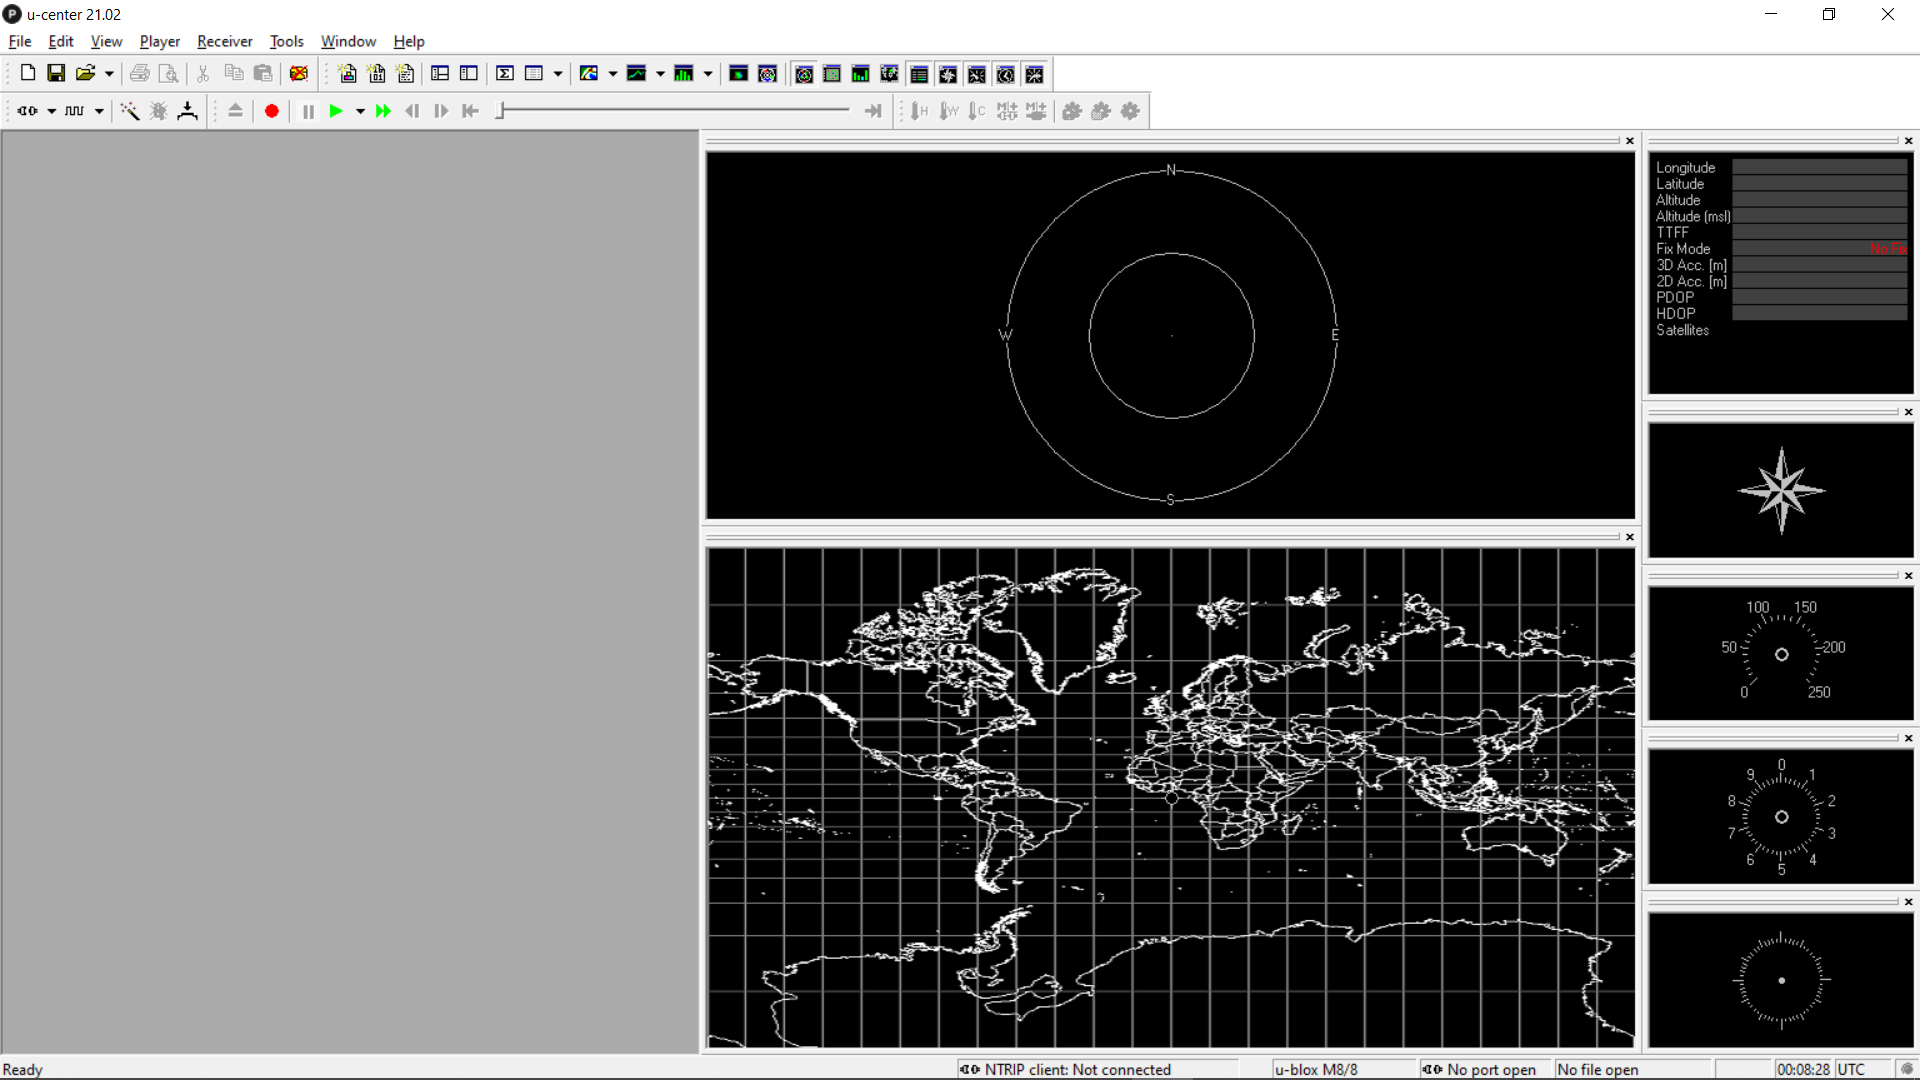
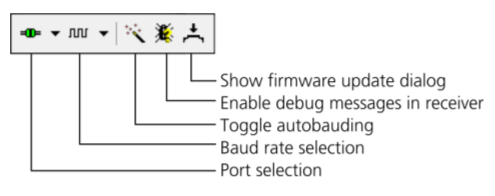
This is the "home screen" for U-Center and is home to many of the tools you will be using to check the various aspects of your connectivity. To connect to your Pi via telemetry, you should pick you baud rate (highlighted blue) for your telemetry units and connect them (highlighted red) using this menu at the top left:
U-Center Tools: Click to expand
There are many tools in U-Center, you can turn them off and on using the menu bar in the upper-middle of the screen that looks like this: 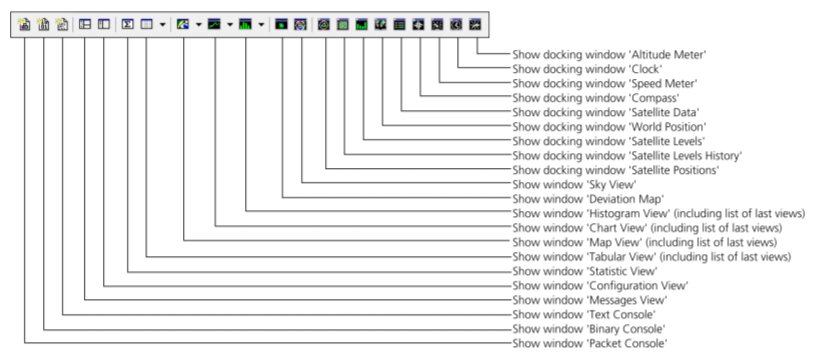
Packet Console: This tool allows you to see and filter packets sent between devices based on PC Time, Name, and Epoch markers.
Binary Console: This tool works like the Packet Console but with Binary Packets.
Text Console: